
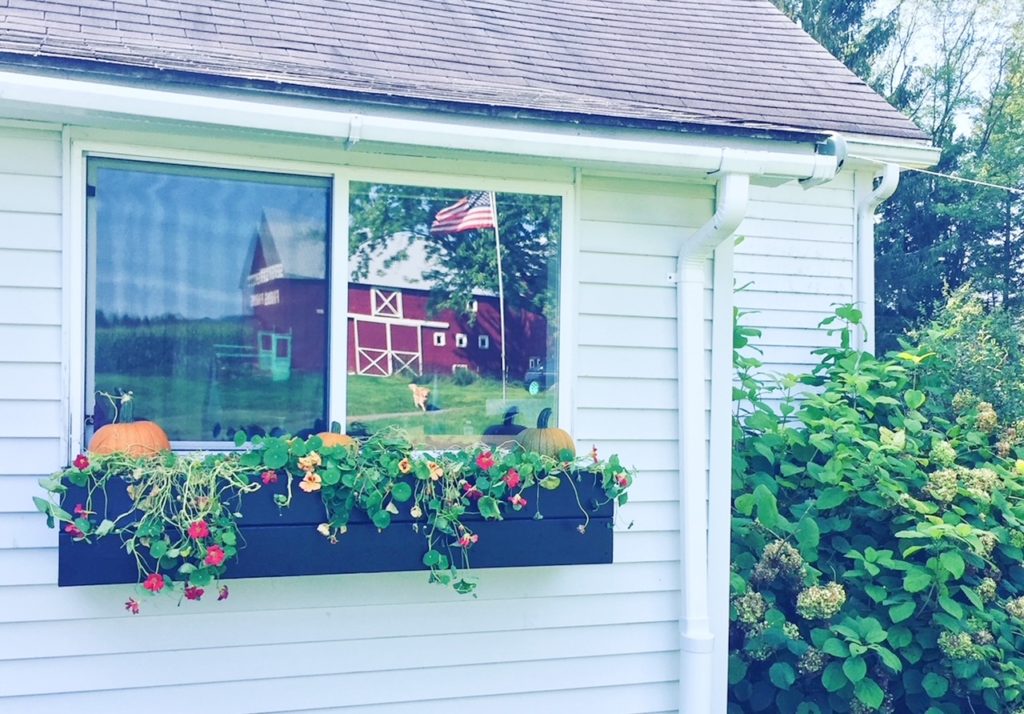
Learn how to make a simple DIY flower box that will add so much character and charm to your home. I share how I built ours step by step.
This post contains affiliate links, which means I make a small commission at no extra cost to you.
DIY Flower Box Materials:
- At least 4 Large Boards for the outside of the flower box (front, back and sides)-I used scrap 2x4s-I used 8 pieces-2 for each side
- 4 smaller boards for each inside corner of larger boards to attach to- 1x2s should work
- 2 long slim boards to attach to front and back for slats to attach to-1x2s would work here too
- Slats for the bottom-Can also use 1x2s here if you don’t have scraps
- Screws and Screw Gun
- Sandpaper
- Paint/Stain
- Paint Brush
- Pots to place in box
- Hanging hardware like a French Cleat if desired (I just screwed ours directly to the house)
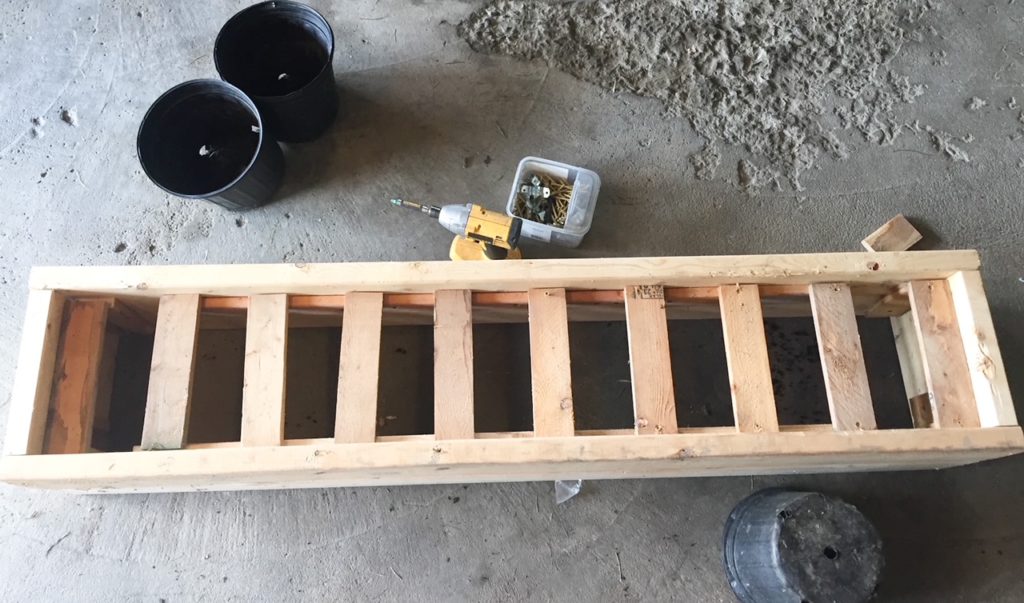
How to Build a Flower Box
- Measure the window you want the box to be under. I made mine as wide as the outside of the little j channel trim we have around our window.
- Measure the width and height of the pots you plan on putting into your window box
- Draw to scale on graph paper. Use the width of the window to determine the width of the box. Use the width of the pots to figure out the depth of the box. Make sure that the pots will fit and will be completely hidden when inside of the box. Remember that the slats will take up some of the height.
- Cut main large boards to length determined by your measurements and drawing, I like to do the front and back boards the full length so that from the front it looks nice and clean
- Screw through the small inside corner pieces to attach the front, back and sides. This way you don’t have to fill any holes
- Screw the 2 long slim boards to the inside of the front and back-the bottom slats will attach to these
- Now you can pre-drill holes and attach the bottom slats to those 2 long slim boards *make sure these slats are close enough together so that your pots will not fall through*
- Sand any rough edges down
- Time to paint or stain. If you paint as always I would do at least 2 coats
- Hang it up, I used long screws to attach ours to the outside of the wall. You can use one of those metal french cleats you can find at a big box hardware store
- Fill up your pots with beautiful flowers/plants and enjoy!

Flower Box Decorating Year Round
It’s finally getting to that time of year where I can daydream about all my outside spring plans. I’m thinking about making more of these flower boxes and filling them with strawberry plants this year. The best part about this flower box is how versatile it is. It is so easy to change out the flowers since they are in pots you can just change out at a moments notice. Also the slots save the bottom from rotting out. This was one of my favorite projects. It came together so fast, and I love the final result so much.
Spring Time
In the spring I love to fill this flower box with all the pretty flowers I can get my hands on. I love the ones that spill over most, but to have a nice full look it’s good to have some that give some height as well. I also have a fun wooden bunny garland that I swag across the front. Garlands are not just for indoor decor.
Summer Time
In the summer I have these metal stars I like to add to the front of the box. Usually the flowers are still in good shape so I just keep them going. I like that the metal stars are classic, but also a fun nod to fourth of July and Memorial day.
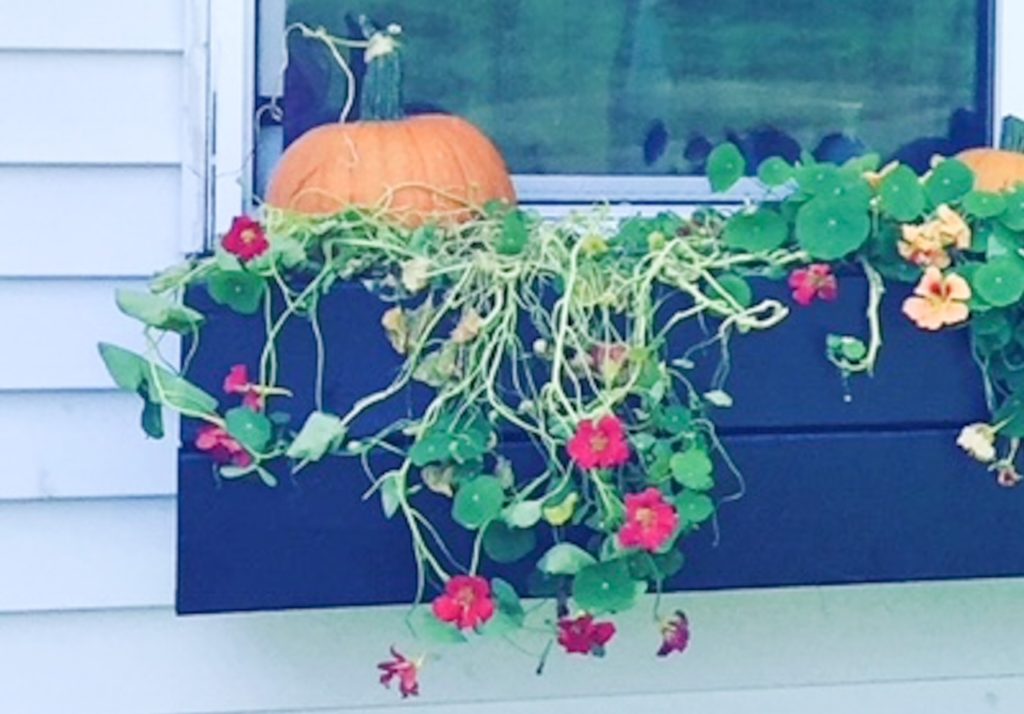
Fall & Festive
As you can see, when it gets closer to fall I like to throw a couple of smaller pumpkins in. They help fill up the box even more. Sometimes by this point not all of my pretty flowers are still hanging in there, so these pumpkins help keep the box looking full.
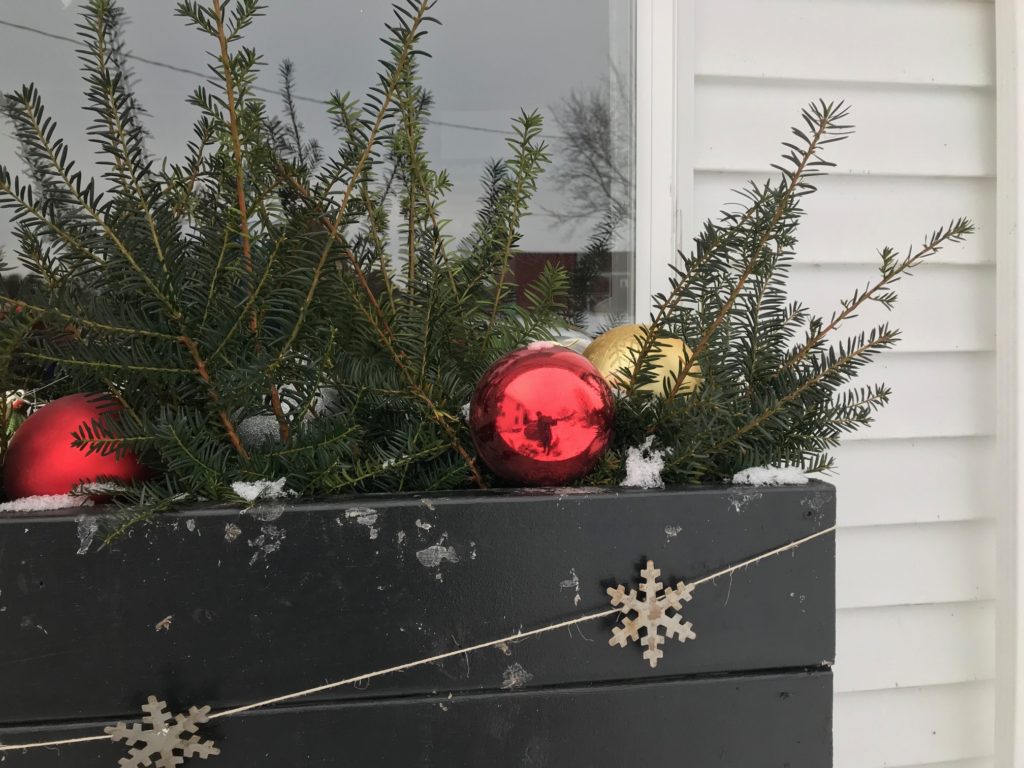
Winter Wonderland
I think a lot of people miss out on the opportunity to decorate their window boxes for winter. I go a bit overboard. I usually trim our evergreen bushes around this time so I take all of those clippings and use them in the window box. I turn all of the pots upside down at this point and stick all of the clippings in between the pots and lay them on top of the pots. Then I add these large ornaments that I snagged from my Mom years ago. I place those on the upside down pots. The final touch is our metal snowflake garland.
I hope this was helpful, and that you feel more confident taking on a project like this. For any other tips or inspiration feel free to check out some of my previous posts. Like our bathroom renovation or stair railing makeover. If you are looking for help while designing your own space you can find information on my design your space ebook here. Thanks again for visiting our farmhouse!